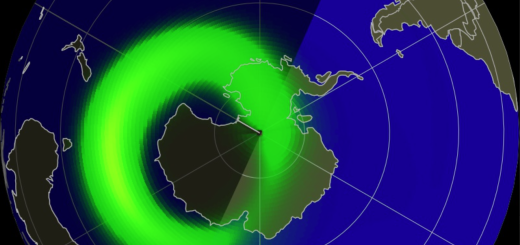
How to Capture the Aurora Australis With Your iPhone
Capturing the mystical Southern Lights, or Aurora Australis, with an iPhone is challenging. Still, with the right techniques, you can snap stunning shots of this natural wonder. The adaptability of modern iPhones, packed with features that make low-light photography easier than ever, allows you to turn your phone into a powerful tool for aurora hunting. Here’s a step-by-step guide to help you harness this power and capture the magic of the aurora on your iPhone with clarity and detail.
Enable Night Mode: Harnessing the Power of Long Exposure
Your iPhone’s Night Mode is the secret weapon for low-light photography, and it automatically activates in darker conditions. This feature, designed for ease of use, is your ally in capturing the faint and ethereal lights of the Aurora Australis. When enabled, you’ll notice a moon icon in the corner of your screen, indicating that you’re ready to capture the magic.
To maximize your chances of getting a crisp, vibrant shot:
- Swipe on the moon icon to adjust the exposure time to its maximum. This allows the camera sensor to absorb more light from the aurora, resulting in better detail and colour.
- Night Mode is available on iPhones from the iPhone 11 and newer, so make sure you use one of these models for the best experience.
Pro Tip: While Night Mode helps with low light, it works best when paired with a stable iPhone, which brings us to the next point.
Use a Tripod: Keep Your Phone Steady for Clear Shots
Even with Night Mode’s long exposure, any small movement while taking the shot can cause blurring. To ensure you’re fully prepared, mount your iPhone on a tripod. The Aurora Australis may be subtle and faint, so this step is key to capturing the finest details with clarity and precision.
If you don’t have a tripod handy, improvise! Use a stable surface like a rock, table, or your car’s hood to keep your iPhone steady. Additionally, if you have an Apple Watch, you can remotely trigger the camera from your wrist, reducing the chance of shaking your phone when pressing the shutter button.
Pro Tip: If you don’t own an Apple Watch, you can also use the self-timer feature on your iPhone to avoid touching it altogether. Set a timer for 3 or 10 seconds, step back, and let your phone take the shot without any risk of movement.
Choose the 1x Wide-Angle Lens: Best for Low Light.
Your iPhone has multiple lenses, but you’ll want to use the 1x wide-angle lens to capture the Southern Lights. This lens has the largest aperture, which can gather the most light, crucial in low-light settings like Aurora photography.
Here’s why the wide-angle lens is your best choice:
- It produces the brightest and clearest images in low-light situations.
- The wide field of view ensures you capture as much of the sky—and the sweeping auroras—as possible.
- This lens is optimized for Night Mode on newer iPhone models, which ensures you’re taking full advantage of the iPhone’s low-light capabilities.
Avoid zoom lenses; they lose quality in low light and won’t capture the aurora with the same brightness and clarity.
Manually Focus: Get Crystal Clear Shots
Your iPhone is brilliant, but when it comes to shooting the night sky, you’ll need to help it out by manually focusing on the auroras.
To manually focus:
- Tap the screen on the area where you want to focus—whether that’s the night sky or an object in the foreground.
- If you’re focusing on the sky, your iPhone will automatically focus to infinity, which is ideal for capturing distant light sources like the aurora.
If you’re incorporating objects like trees or mountains in the foreground for a more dynamic shot, tap to focus on them. This way, you’ll get the foreground and the aurora in sharp detail.
Adjust Shutter Speed: Capture Faint Auroras
If the aurora is faint or only faintly glowing, increase the shutter speed to let more light in. You can do this directly in Night Mode by swiping up on the screen and adjusting the exposure time.
A longer shutter speed allows the camera sensor to stay open, collecting more light and brightening your image. However, be cautious: a too-long exposure can cause stars to blur as the Earth rotates, or the auroras may appear smeared if they move quickly.
A good starting point is to experiment with an exposure time of around 10 seconds and adjust as needed depending on how bright the aurora appears.
Shoot in RAW: More Control for Editing
Enabling RAW mode on your iPhone offers the best editing flexibility. RAW format captures more data in each photo, allowing for better exposure, colour, and detail adjustments without losing quality in post-processing.
To enable RAW:
- Go to Settings > Camera > Formats and toggle on Apple ProRAW.
- Once activated, you’ll see a “RAW” button in your camera interface—tap this to capture your aurora photos in the highest possible quality.
Shooting in RAW is especially useful if the auroras aren’t as bright as you hoped, as you’ll be able to bring out more details in post-processing using apps like Adobe Lightroom or even iPhone’s built-in editing tools.
Bonus Tips for Stunning Aurora Photos
- Lower ISO Sensitivity: If your aurora appears too grainy, manually lower the ISO in camera apps like Halide or Lightroom. This reduces noise but may darken the image, so balance it carefully.
- Use a Star Tracking App: To help find the best angle and location for shooting the aurora, use star-tracking apps to determine where the aurora is most likely to appear based on geomagnetic activity.
- Experiment with Different Compositions: Don’t just point your phone at the sky—experiment with foreground objects like silhouettes, mountains, or lakes for creative and dynamic compositions that give scale to the aurora.
Combining these techniques and using your iPhone’s advanced features, you can confidently head out to capture breathtaking images of the Aurora Australis. With patience, the right settings, and some clear southern skies, you’ll have photos that will make you the envy of any aurora chaser!